相思资源网 Design By www.200059.com
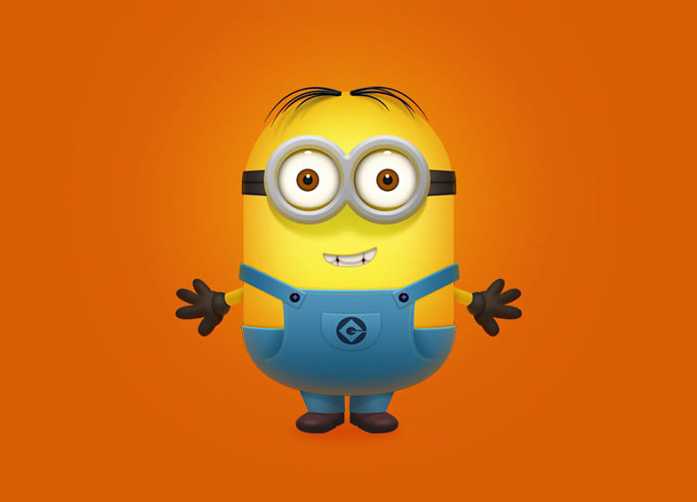
小黄人已经是个无需介绍的人气角色,呆萌的外表让他成为了践踏主角的超级巨星,在全球拥有无数粉丝。作为喜欢小黄人的设计师,是不是一定要懂得3D软件才能做出小黄人呢?NoNo-今天川老师就教大家用Photoshop快速做出一个小黄人。
最终效果
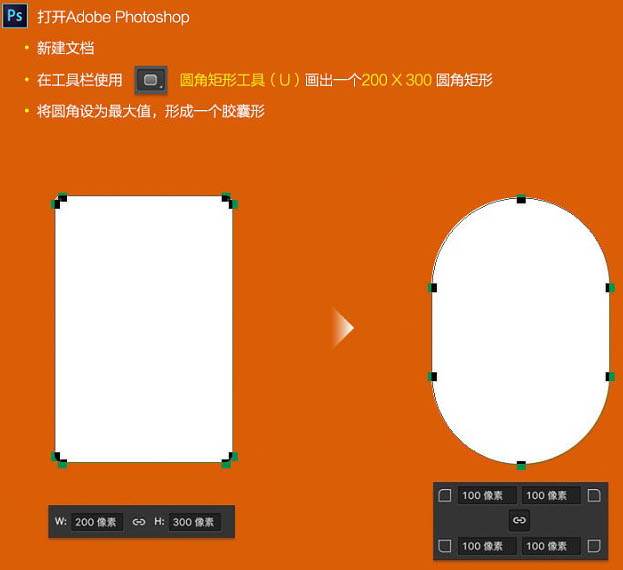
1、打开Photoshop,新建文档,在工具栏使用圆角矩形工具,画出一个200 * 300圆角矩形,将圆角设置为最大值,形成一个胶囊形。
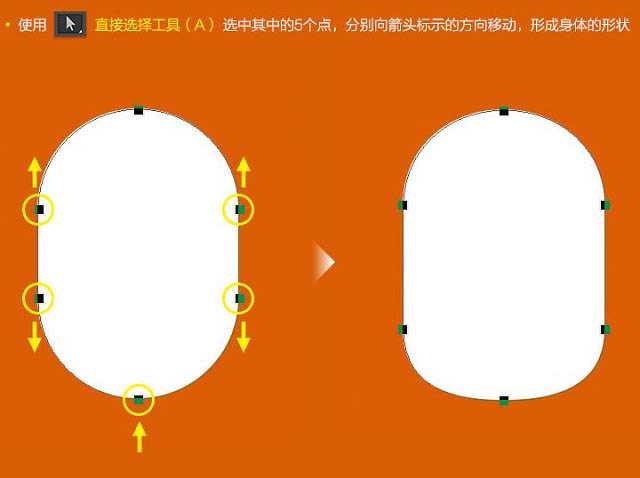
2、使用直接选择工具,选中其中的5个点,分别向箭头标示的方向移动,形成身体的形状。
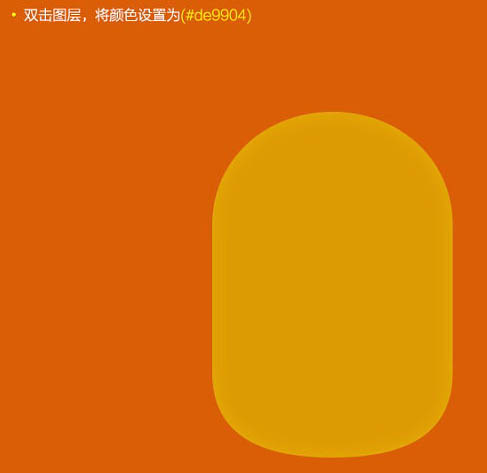
3、双击图层,将颜色设置为:#de9904。
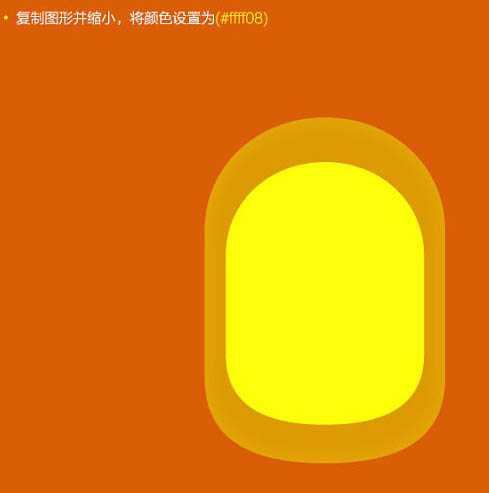
4、复制图形并缩小,将颜色设置为:#ffff08。
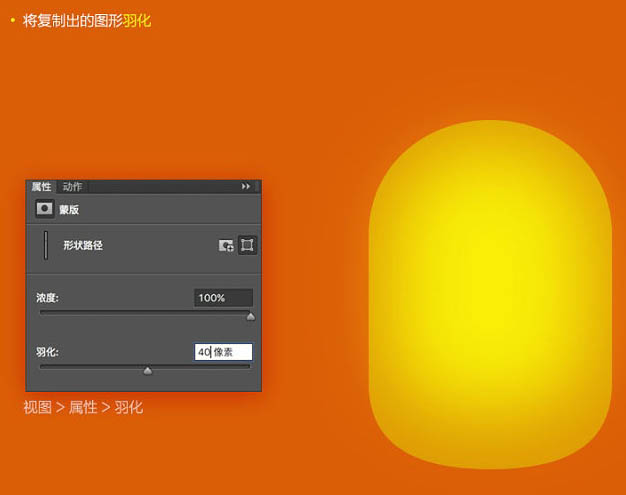
5、将复制出的图形羽化。
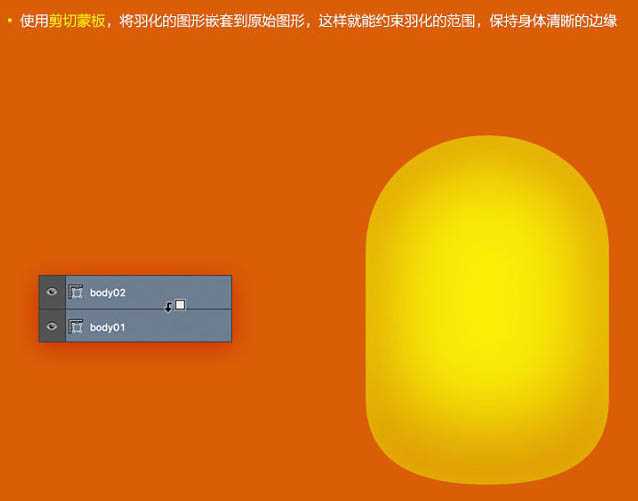
6、使用剪切蒙版,将羽化的图形嵌套到原始图形,这样就能约束羽化的范围,保持身体清晰的边缘。

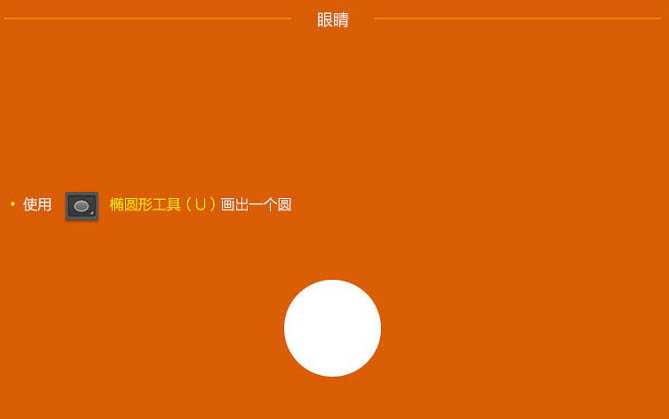
7、眼睛部分制作,使用椭圆工具画出一个圆。
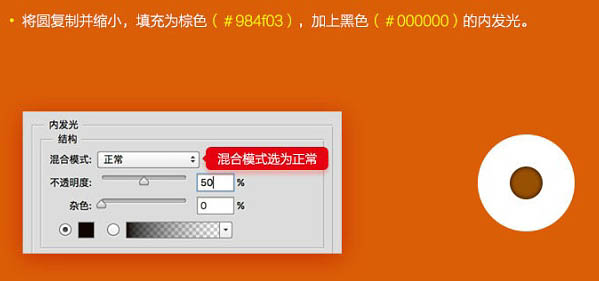
8、将圆复制并缩小,填充为棕色:#984f03,加上黑色的内发光。
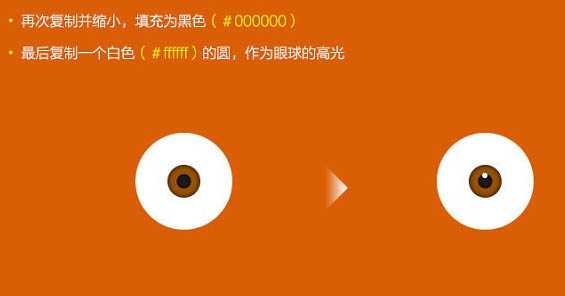
9、再次复制并缩小,填充为黑色。最后复制一个白色的圆,作为眼球的高光。
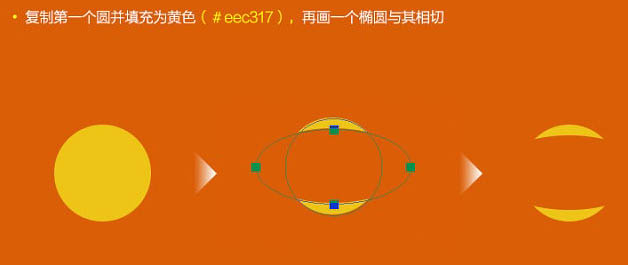
10、复制第一个圆并填充为黄色:#eec317,再画一个椭圆与其相切。
11、将所有眼睛图层合并或建立成组。

12、双击合并后的图层,添加黑色的内发光。

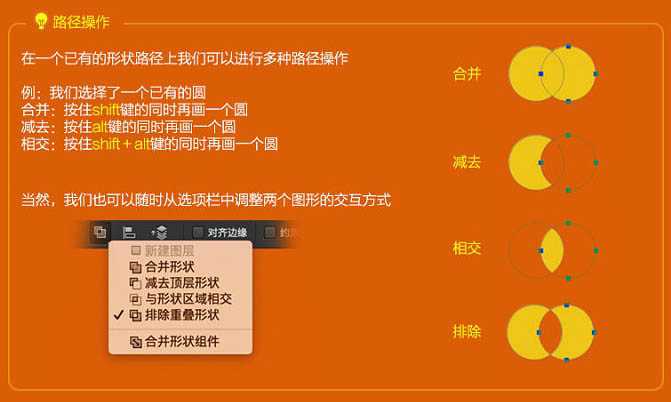
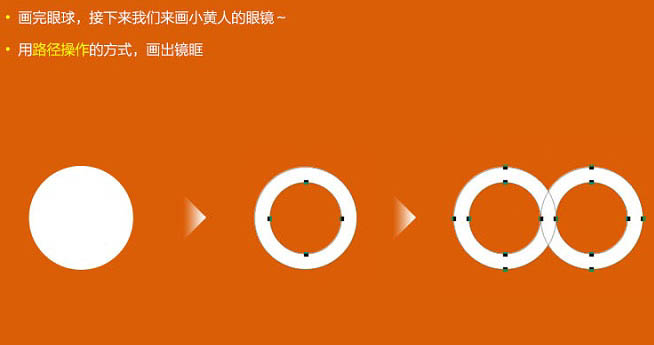
13、画完眼球,接下来我们来画小黄人的眼镜,用路径操作的方式,画出镜框。
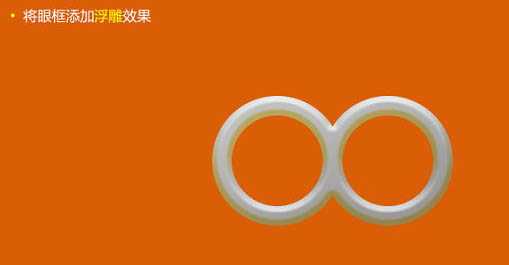
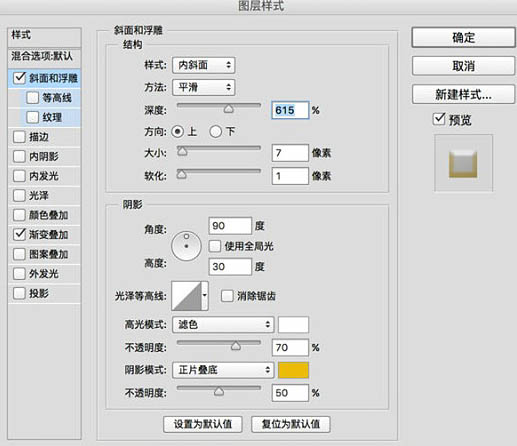
14、将镜框添加浮雕效果。
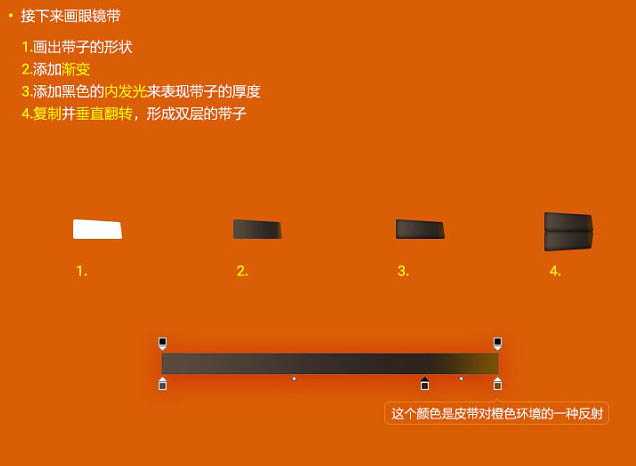
15、接下来画眼镜带:
画出带子的形状,添加渐变,添加黑色的内发光来表现带子的厚度。复制并垂直翻转,形成双层的带子。
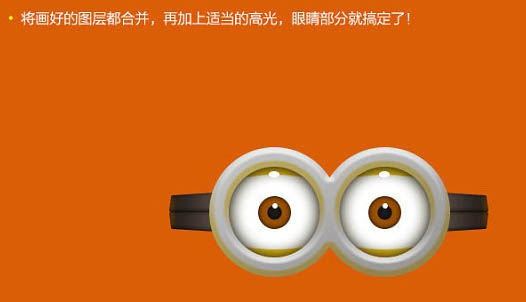
16、将画好的图层都合并,再加上适当的高光,眼睛部分就搞定了。
上一页12 下一页 阅读全文
最终效果
1、打开Photoshop,新建文档,在工具栏使用圆角矩形工具,画出一个200 * 300圆角矩形,将圆角设置为最大值,形成一个胶囊形。
2、使用直接选择工具,选中其中的5个点,分别向箭头标示的方向移动,形成身体的形状。
3、双击图层,将颜色设置为:#de9904。
4、复制图形并缩小,将颜色设置为:#ffff08。
5、将复制出的图形羽化。
6、使用剪切蒙版,将羽化的图形嵌套到原始图形,这样就能约束羽化的范围,保持身体清晰的边缘。
7、眼睛部分制作,使用椭圆工具画出一个圆。
8、将圆复制并缩小,填充为棕色:#984f03,加上黑色的内发光。
9、再次复制并缩小,填充为黑色。最后复制一个白色的圆,作为眼球的高光。
10、复制第一个圆并填充为黄色:#eec317,再画一个椭圆与其相切。
11、将所有眼睛图层合并或建立成组。
12、双击合并后的图层,添加黑色的内发光。
13、画完眼球,接下来我们来画小黄人的眼镜,用路径操作的方式,画出镜框。
14、将镜框添加浮雕效果。
15、接下来画眼镜带:
画出带子的形状,添加渐变,添加黑色的内发光来表现带子的厚度。复制并垂直翻转,形成双层的带子。
16、将画好的图层都合并,再加上适当的高光,眼睛部分就搞定了。
上一页12 下一页 阅读全文
标签:
小黄人,3D
相思资源网 Design By www.200059.com
广告合作:本站广告合作请联系QQ:858582 申请时备注:广告合作(否则不回)
免责声明:本站文章均来自网站采集或用户投稿,网站不提供任何软件下载或自行开发的软件! 如有用户或公司发现本站内容信息存在侵权行为,请邮件告知! 858582#qq.com
免责声明:本站文章均来自网站采集或用户投稿,网站不提供任何软件下载或自行开发的软件! 如有用户或公司发现本站内容信息存在侵权行为,请邮件告知! 858582#qq.com
相思资源网 Design By www.200059.com
暂无PS鼠绘制作超萌的3D小黄人的评论...