相思资源网 Design By www.200059.com
本小节完成的效果图。


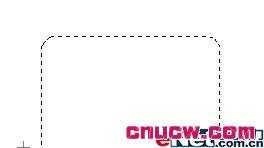
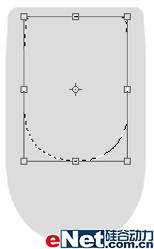
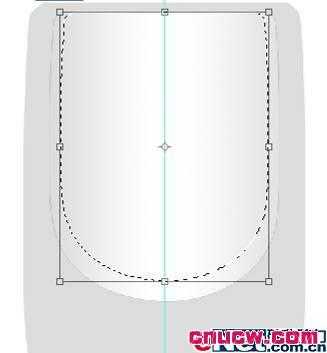
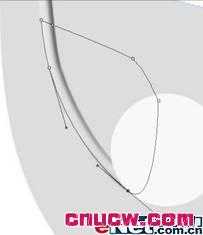
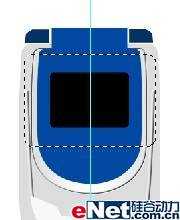
调整路径到如图4.1-9所示效果——使上边窄一些,两侧线条要具有一定弧度。


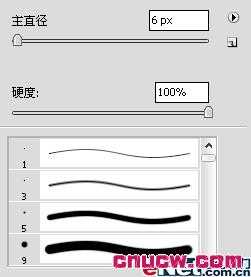
设置前景色为上面设置的灰色。选择画笔工具(快捷键B),在文档窗口单击右键,在弹出的调板中设置画笔参数,如图4.1-17所示。

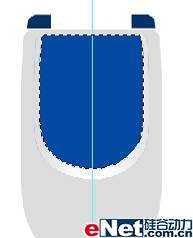
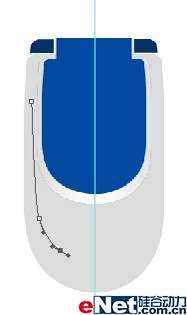
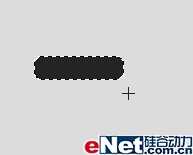
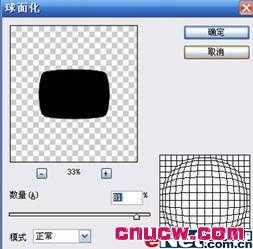
新建图层,先绘制一个白色的圆形,再用钢笔工具(快捷键P)绘制如图4.1-20的路径。将路径转换为选区后填充白色,命名该层为摄像头。

选择图层调板最上面的图层所略图,按下键盘上的Shift键,同时用鼠标单击背景层上面缩略图,选择该两个图层,及其中间的图层。按下键盘上的Ctrl+G 组合键,将图层编组,命名为手机上盖。
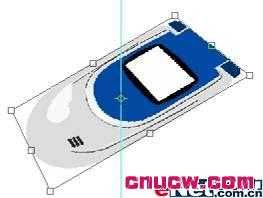
〈下键盘上的Ctrl+T组合键,自由变换该组,按下键盘上的Ctrl键不放,拖拽变换控制点到如图4.1-27所示效果。
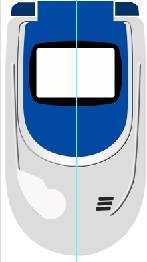
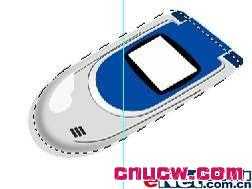
设置画笔工具(快捷键B)为主直径较大,硬度较低的笔触。设置前景色为深灰色(色彩接近即可),用画笔工具沿手机选区外侧按图4.1-28所示方式画上阴影。

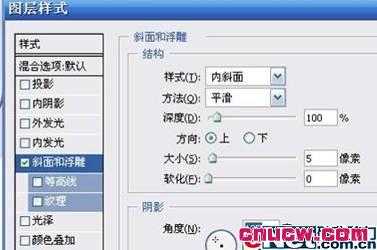
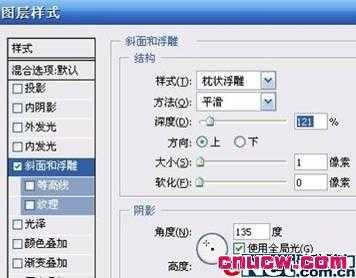
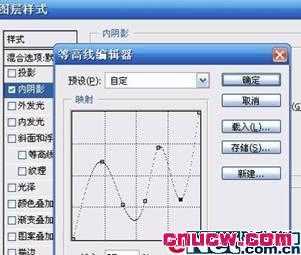
双击手机上盖组中摄像头图层在图层调板中的缩略图,在弹出的图层样式对话框中选择内阴影,编辑等高线曲线,如图4.1-30所示。

调整路径到如图4.1-9所示效果——使上边窄一些,两侧线条要具有一定弧度。
设置前景色为上面设置的灰色。选择画笔工具(快捷键B),在文档窗口单击右键,在弹出的调板中设置画笔参数,如图4.1-17所示。
新建图层,先绘制一个白色的圆形,再用钢笔工具(快捷键P)绘制如图4.1-20的路径。将路径转换为选区后填充白色,命名该层为摄像头。
选择图层调板最上面的图层所略图,按下键盘上的Shift键,同时用鼠标单击背景层上面缩略图,选择该两个图层,及其中间的图层。按下键盘上的Ctrl+G 组合键,将图层编组,命名为手机上盖。
〈下键盘上的Ctrl+T组合键,自由变换该组,按下键盘上的Ctrl键不放,拖拽变换控制点到如图4.1-27所示效果。
设置画笔工具(快捷键B)为主直径较大,硬度较低的笔触。设置前景色为深灰色(色彩接近即可),用画笔工具沿手机选区外侧按图4.1-28所示方式画上阴影。
双击手机上盖组中摄像头图层在图层调板中的缩略图,在弹出的图层样式对话框中选择内阴影,编辑等高线曲线,如图4.1-30所示。
新建图层,绘制一个椭圆形选区,填充灰色。不取消选区,自由变换到如图4.1-32所示效果。
上一页12 下一页 阅读全文
标签:
三星,手机
相思资源网 Design By www.200059.com
广告合作:本站广告合作请联系QQ:858582 申请时备注:广告合作(否则不回)
免责声明:本站文章均来自网站采集或用户投稿,网站不提供任何软件下载或自行开发的软件! 如有用户或公司发现本站内容信息存在侵权行为,请邮件告知! 858582#qq.com
免责声明:本站文章均来自网站采集或用户投稿,网站不提供任何软件下载或自行开发的软件! 如有用户或公司发现本站内容信息存在侵权行为,请邮件告知! 858582#qq.com
相思资源网 Design By www.200059.com
暂无如何使用Photoshop手绘制三星翻盖手机的评论...