原图

最终效果

1.打开原图按Ctrl + J复制一层,然后把图层混合模式改为“正片叠底”,然后加上图层蒙版把人物部分擦出来,效果如图1

<图1>
2.新建一个图层按Ctrl + Shift + Alt + E盖印图层,然后把前景颜色设置为:#033F5D,背景颜色设置为:#624106,执行菜单:滤镜 > 渲染 > 分层云彩,确定后把图层混合模式改为“柔光”,效果如图2

<图2>
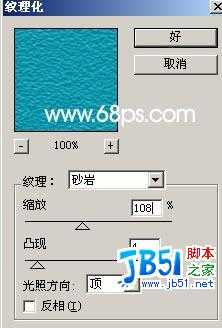
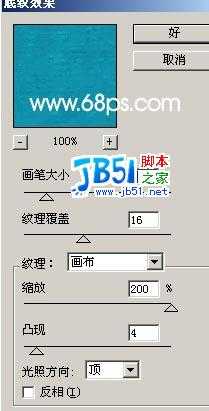
3.新建一个图层填充颜色:#1096AA,然后执行菜单:滤镜 > 纹理 > 纹理化,参数设置如图3,确定后再执行菜单:滤镜 > 艺术效果 > 底纹效果,参数设置如图4,确定后再把图层混合模式改为“叠加”,效果如图5

<图3>

<图4>

<图5>
4.新建一个图层按字母“D”,把前背景颜色恢复到默认的黑白,然后执行菜单:滤镜 > 渲染 > 云彩,然后把图层混合模式改为“叠加”,加上图层蒙版把脸部擦出来效果如图6。

<图6>
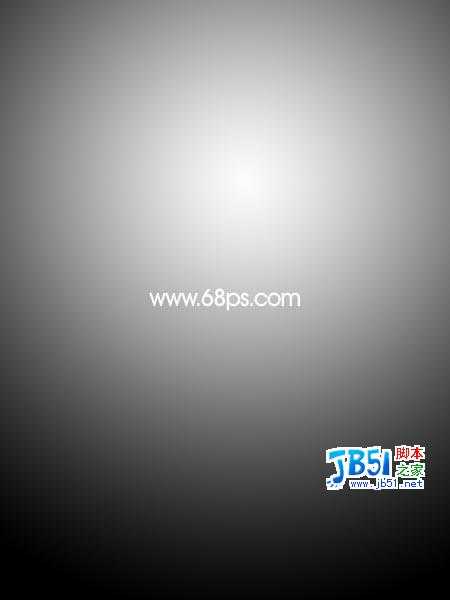
5.新建一个图层使用黑白渐变工具绘制图7所示的径向渐变,然后把图层混合模式改为“叠加”,图层不透明度改为:40%效果如图8

<图7>

<图8>
6.按Ctrl + Alt + ~调出高光选区,填充颜色:#FAE2A9,把图层混合模式改为“正片叠底”,效果如图9

<图9>
7.按Ctrl + Alt + ~调出高光选区,填充白色效果如图10

<图10>
8.新建一个图层按Ctrl + Shift + Alt + E盖印图层,然后把图层混合模式改为“柔光”,图层不透明度改为:50%,效果如图11

<图11>
9.新建一个图层填充抽丝图案效果如图12。

<图12>
10.合并所有图层使用加深减淡工具调下整体明暗完成最终效果。

免责声明:本站文章均来自网站采集或用户投稿,网站不提供任何软件下载或自行开发的软件! 如有用户或公司发现本站内容信息存在侵权行为,请邮件告知! 858582#qq.com
P70系列延期,华为新旗舰将在下月发布
3月20日消息,近期博主@数码闲聊站 透露,原定三月份发布的华为新旗舰P70系列延期发布,预计4月份上市。
而博主@定焦数码 爆料,华为的P70系列在定位上已经超过了Mate60,成为了重要的旗舰系列之一。它肩负着重返影像领域顶尖的使命。那么这次P70会带来哪些令人惊艳的创新呢?
根据目前爆料的消息来看,华为P70系列将推出三个版本,其中P70和P70 Pro采用了三角形的摄像头模组设计,而P70 Art则采用了与上一代P60 Art相似的不规则形状设计。这样的外观是否好看见仁见智,但辨识度绝对拉满。
